Flux-Text执行流程记录
2025-07-14
FluxText是最新的解决中文文本编辑的方案。本文记录其详细的执行流程,以备后查。
1、预处理
在我的例子中,我使用anyword-3M数据集。这个数据中有图片中每段文字的矩形框坐标。
预处理阶段,会先根据这个矩形框坐标做出一个mask。
再根据这个mask的信息,创造一个包含要写入的汉字的二值图,这个mask也会进一步处理成仅包含01的叫hint的二值数组。
def get_glyph_pos(mask, text, width, height):
    """生成字形图像"""
    # 确保遮罩是单通道的
    if len(mask.shape) == 3:
        mask = mask[:, :, 0]  # 取第一个通道

    mask = mask.astype('uint8')
    contours, _ = cv2.findContours(mask, cv2.RETR_EXTERNAL, cv2.CHAIN_APPROX_SIMPLE)
    hint = mask / 255
    glyph_scale = 1

    if len(contours) > 0:
        # 找到最大的轮廓
        largest_contour = max(contours, key=cv2.contourArea)

        # 检查轮廓是否足够大
        rect = cv2.minAreaRect(largest_contour)
        w, h = rect[1]

        # 确保轮廓的宽度和高度都至少为20像素,避免字体大小为0
        if w >= 20 and h >= 20:
            glyphs = draw_glyph2(selffont, text, largest_contour, scale=glyph_scale, width=width, height=height)
        else:
            # 如果轮廓太小,创建一个最小尺寸的矩形轮廓
            center_x, center_y = int(width/2), int(height/2)
            min_size = 50  # 最小尺寸
            min_contour = np.array([
                [center_x - min_size//2, center_y - min_size//2],
                [center_x + min_size//2, center_y - min_size//2],
                [center_x + min_size//2, center_y + min_size//2],
                [center_x - min_size//2, center_y + min_size//2]
            ], dtype=np.int32)
            glyphs = draw_glyph2(selffont, text, min_contour, scale=glyph_scale, width=width, height=height)
    else:
        # 如果没有找到轮廓,创建一个默认的中心矩形轮廓
        center_x, center_y = int(width/2), int(height/2)
        default_size = 100
        default_contour = np.array([
            [center_x - default_size//2, center_y - default_size//2],
            [center_x + default_size//2, center_y - default_size//2],
            [center_x + default_size//2, center_y + default_size//2],
            [center_x - default_size//2, center_y + default_size//2]
        ], dtype=np.int32)
        glyphs = draw_glyph2(selffont, text, default_contour, scale=glyph_scale, width=width, height=height)

    return hint, glyphs
这里面有一些细节需要留意,根据mask找到图中的各种轮廓(contours),然后找到最大的轮廓,再找到能包住最大轮廓的矩形。
然后会创建一个和原图一样大小的参考图,在矩形位置写入汉字。
这是draw_glyph2做的事儿,里面还有一些细节,比如根据轮廓大小和和原图大小,去找到合适的字体大小。
举例:
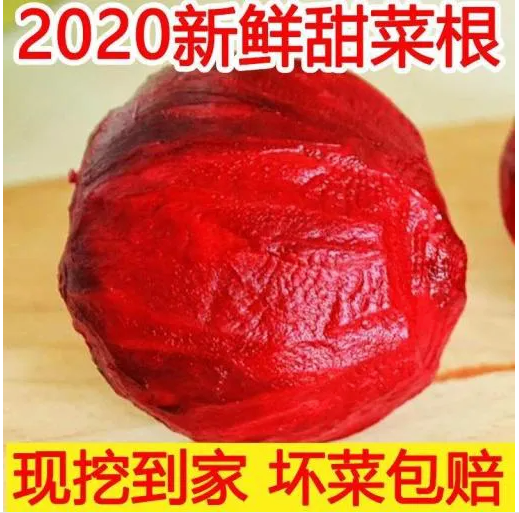
我想把上图中的“2020新鲜甜菜根”修改为“2020不新鲜甜菜根”
最后走到generate_fill方法时:
res = generate_fill(
        pipe,
        prompt=prompt,
        conditions=[condition],
        height=tgt_height,
        width=tgt_width,
        generator=generator,
        model_config=config.get("model", {}),
        default_lora=True,
    )
prompt是:
a peeled beetroot with its vibrant red interior clearly visible. The text 2020新鲜甜菜根 and 现挖到家 坏菜包赔 suggests that this could be a promotional advertisement for fresh beets. The background appears to be a wooden cutting board, indicating the preparation of food., that reads "2020不新鲜甜菜根"
that reads 是一个模板提示符的作用。
condition是:
condition = Condition(
                    condition_type='word_fill',
                    condition=condition_img,
                    position_delta=position_delta,
            )
position_delta 是[0,0],应该就是一个位置偏移。
condition_img 的值是: [condition_img, hint, img_resized]
condition_img是将要写入的汉字的图,hint就是mask, img_resized就是原图,只是大小做了调整。这里面有一个condition_img套娃。不留心一下,后面代码就会看得比较费解。
2、提示词编码
prompt分别经过clip和t5进行编码。分别得到pooled_prompt_embeds和prompt_embeds。
(
        prompt_embeds,
        pooled_prompt_embeds,
        text_ids,
    ) = self.encode_prompt(
        prompt=prompt,
        prompt_2=prompt_2,
        prompt_embeds=prompt_embeds,
        pooled_prompt_embeds=pooled_prompt_embeds,
        device=device,
        num_images_per_prompt=num_images_per_prompt,
        max_sequence_length=max_sequence_length,
        lora_scale=lora_scale,
    )
有一个地方需要注意,prompt将 that reads模板放在文本最后,在进入clip进行编码时,如果长度超过77,就会被裁剪掉。我使用的anyword数据集,自带caption,很多长度都是超过这个数字的。
pooled_prompt_embeds的shape是[1, 768]。
prompt_embeds的shape是[1, 512, 4096]。512是t5设置的最大长度,所以这里肯定是编码了要写的文字的。
text_ids的shape是[512, 3] 这是t5返回的位置编码,是全0。之所以是3,是为了和图像的位置编码对齐。
然后就是准备噪声
latents, latent_image_ids = self.prepare_latents(
        batch_size * num_images_per_prompt,
        num_channels_latents,
        height,
        width,
        prompt_embeds.dtype,
        device,
        generator,
        latents,
    )
latents的shape是[1,1024, 64], latent_image_ids的shape是[1024,3]。这里的64是固定的,等于num_channels_latents*2*2。num_channels_latents的值是16。
之所以是2乘2是因为vit将图片patchify成这样的小块。1024则是取决于图片的宽高。
3、条件图像编码
这部分的条件图像编码指的是写有要写上去的文本的图像的编码。
condition_img, hint, imgs = conditions[0].condition
type_id = conditions[0].type_id
_height = 2 * (int(height) // (self.vae_scale_factor * 2))
_width = 2 * (int(width) // (self.vae_scale_factor * 2))
condition_height, condition_width, _ = condition_img.shape
condition_height = 2 * (int(condition_height) // (self.vae_scale_factor * 2))
condition_width = 2 * (int(condition_width) // (self.vae_scale_factor * 2))

condition_latents, condition_ids = encode_images(self, condition_img)
condition_type_ids = (torch.ones_like(condition_ids[:, 0]) * type_id).unsqueeze(1)
这里encode_images就是对图像进行vae编码。 condition_ids同样是位置编码
值得一提的是,这里有一个condition_type_ids,这个就和bert中的segment_id是一个意思。
在这里的type是4,也就是对应上面的Condition的condition_type='word_fill',
通过源码可以知道,其他的type有depth等,不过本文不涉及。
4、原始图像编码
condition_img = condition_img[:, :, 0]
mask_image = hint[:, :, 0]

imgs = self.image_processor.preprocess(imgs, height=height, width=width)
mask_image = self.mask_processor.preprocess(mask_image, height=height, width=width)
masked_image = imgs * (1 - mask_image)
def _encode_mask(images):
    images = images.to(self.device).to(self.dtype)
    images = self.vae.encode(images).latent_dist.sample()
    images = (
        images - self.vae.config.shift_factor
    ) * self.vae.config.scaling_factor
    condition_images = F.interpolate(images, size=(condition_height, condition_width), mode='nearest')

    images_tokens = self._pack_latents(images, *images.shape)
    images_ids = self._prepare_latent_image_ids(
        images.shape[0],
        images.shape[2],
        images.shape[3],
        self.device,
        self.dtype,
    )
    conditon_images_tokens = self._pack_latents(condition_images, *condition_images.shape)
    return images_tokens, images_ids, conditon_images_tokens
    # return images_tokens, images_ids
masked_image_latents, _, conditon_masked_images_latents = _encode_mask(masked_image)
这里比较好玩的一点,所谓原始图像,已经是扣去了要填字的那块区域的图像。并且,返回了两个编码。
masked_image_latents这个用来作为原始图像,给生成做参考。conditon_masked_images_latents这个是用来和上面的条件图像合并在一起,作为条件输入的。
虽然在这个例子中,二者的shape都是[1,1024, 64]
但是这种分离的处理方法,实际上允许masked_image_latents使用更大的尺寸,以便保留更多的细节。
小结一下,实际上有4个条件输入,clip编码,t5编码,字形编码,原始图像mask后编码。
5、mask编码
mask为啥也要编码呢,答案是提供位置信息。
mask = mask_image
mask = torch.tensor(mask)
mask = mask.view(batch_size, _height, self.vae_scale_factor, _width, self.vae_scale_factor)
mask = mask.permute(0, 2, 4, 1, 3)  # batch_size, 8, 8, height, width
mask = mask.reshape(
    batch_size, self.vae_scale_factor * self.vae_scale_factor, _height, _width
)  # batch_size, 8*8, height, width
mask = self._pack_latents(mask, batch_size, self.vae_scale_factor * self.vae_scale_factor, _height, _width)
mask = mask.to(masked_image_latents.device, dtype=masked_image_latents.dtype)

masked_image_latents = torch.cat((masked_image_latents, mask), dim=-1)
源码中有mask_image和masked_image,一不小心就会搞错。
这里单独强调一下。mask_image就是mask, masked_image是原始图像扣去mask后的图像,所以是masked。
这里将mask编码后,与原始图像的vae编码拼接在一起了。
作为参考图像的一部分。
好玩的是,这个mask_image也被编码后condition的一部分了。
condition_mask = mask_image
condition_mask = F.interpolate(condition_mask, size=(condition_img.shape[0], condition_img.shape[1]), mode='nearest')
condition_mask = condition_mask.view(batch_size, condition_height, self.vae_scale_factor, condition_width, self.vae_scale_factor)
condition_mask = condition_mask.permute(0, 2, 4, 1, 3)  # batch_size, 8, 8, height, width
condition_mask = condition_mask.reshape(
    batch_size, self.vae_scale_factor * self.vae_scale_factor, condition_height, condition_width
)  # batch_size, 8*8, height, width
condition_mask = self._pack_latents(condition_mask, batch_size, self.vae_scale_factor * self.vae_scale_factor, condition_height, condition_width)
condition_mask = condition_mask.to(conditon_masked_images_latents.device, dtype=conditon_masked_images_latents.dtype)

conditon_masked_images_latents = torch.cat((conditon_masked_images_latents, condition_mask), dim=-1).to(self.dtype)
和上面的conditon_masked_images_latents合并在一起,作为条件的一部分。好玩的是,这两个既作为不变的参考,也作为条件输入,驱动扩散过程。
6、计算时间步
# 5. Prepare timesteps
sigmas = np.linspace(1.0, 1 / num_inference_steps, num_inference_steps)
image_seq_len = latents.shape[1]
mu = calculate_shift(
    image_seq_len,
    self.scheduler.config.base_image_seq_len,
    self.scheduler.config.max_image_seq_len,
    self.scheduler.config.base_shift,
    self.scheduler.config.max_shift,
)
timesteps, num_inference_steps = retrieve_timesteps(
    self.scheduler,
    num_inference_steps,
    device,
    timesteps,
    sigmas,
    mu=mu,
)
num_warmup_steps = max(
    len(timesteps) - num_inference_steps * self.scheduler.order, 0
)
self._num_timesteps = len(timesteps)
7、去噪
noise_pred = tranformer_forward(
    self.transformer,
    model_config=model_config,
    # Inputs of the condition (new feature)
    condition_latents=torch.cat((condition_latents, conditon_masked_images_latents), dim=2),
    condition_ids=condition_ids,
    condition_type_ids=condition_type_ids,
    # Inputs to the original transformer
    hidden_states=torch.cat((latents, masked_image_latents), dim=2),
    # YiYi notes: divide it by 1000 for now because we scale it by 1000 in the transforme rmodel (we should not keep it but I want to keep the inputs same for the model for testing)
    timestep=timestep / 1000,
    guidance=guidance,
    pooled_projections=pooled_prompt_embeds,
    encoder_hidden_states=prompt_embeds,
    txt_ids=text_ids,
    img_ids=latent_image_ids,
    joint_attention_kwargs=self.joint_attention_kwargs,
    return_dict=False,
)[0]
首先,关注两个torch.cat操作。
condition_latents的shape是[1, 1024, 384]
hidden_states的shape是[1, 1024, 384]
hidden_states就是我们熟知的transformer的输入。
这里的步骤就和step1x-edit差不多了,先过双流,再过单流。
8、总结
本文记录下flux text中的一些计算细节,以备忘查。
原创文章,转载请注明出处,否则拒绝转载!
本文链接:抬头看浏览器地址栏
最新文章
- 2025年文章总结 2025-12-29
- Flux-Text执行流程记录 2025-07-14
- livetalking数字人执行流程 2025-07-13
- Step1X-Edit执行流程(二) 2025-06-25
- Step1X-Edit执行流程(一) 2025-06-24
- 女儿突然知道关心人了 2025-04-28
- shfl_xor_sync原语 2025-04-22
- MHA, GQA, MQA, MLA的代码 2025-04-01
- Bank Conflicts简介 2025-03-05
- FlashAttention解读 2025-03-01